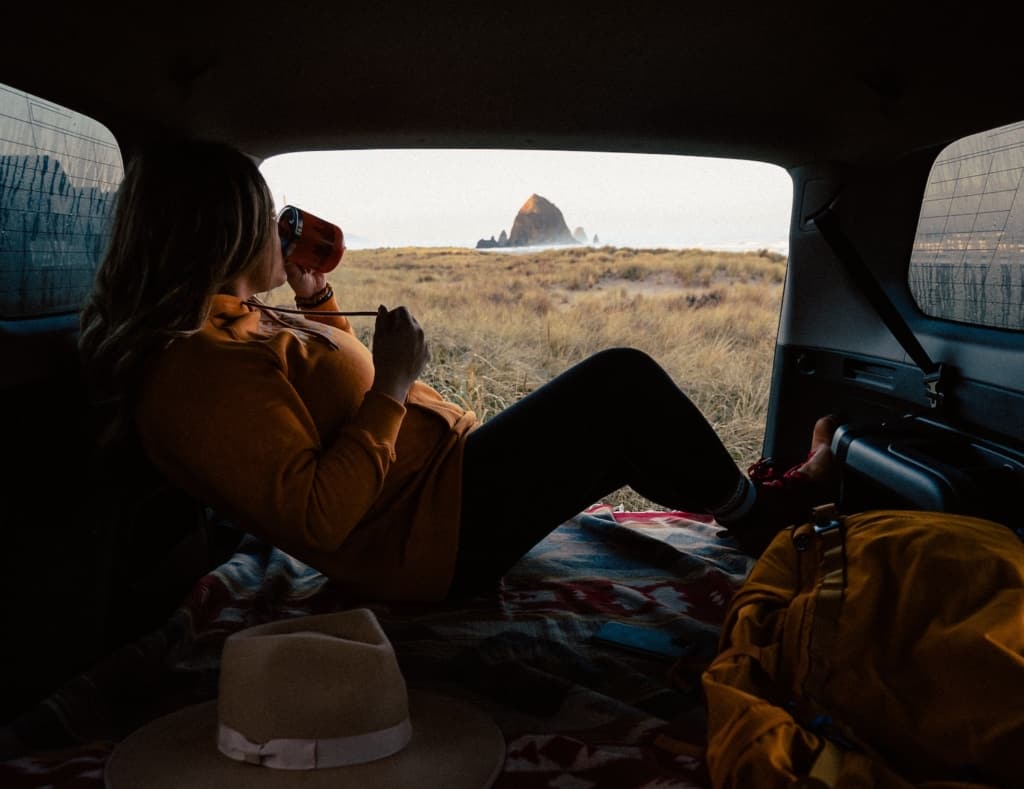
Every morning I look forward to making coffee in my camper van; it gives me that cozy home feeling. But it took more than a year on the road and a variety of coffee makers to find the perfect fit for me. That’s why I’ve rounded up the best coffee makers on the market–hopefully saving you some time (and money)!
This guide of top-rated RV coffee makers covers options for every type of coffee drinker–from the coffee connoisseurs to those on a tight budget.
Note: This post may contain Amazon affiliate links which I will make a small commission on at no extra costs to you.
Table of Contents
How Do You Make Coffee in a Campervan?
There are two ways to make coffee in a van: manually or with an electric coffee maker. Most vanlifers opt for a manual coffee maker since an electric one may use a good chunk of our precious power supply. That being said, there are some impressive 12V coffee makers for campers on the market (we’ll get into that below).
There are a few other things to consider before deciding which magical device will brew your perfect cup ‘o joe:
- How many coffee drinkers are there?
- How much storage space do you have?
- Do you care about minimal waste?
- What’s your budget?
Whatever your needs are, I promise there is a coffee maker out there for you. Most road travelers I meet are pretty serious about their coffee game–if you can think of it, it probably exists.
Most Popular: The Pour-Over

Somehow the pour-over coffee maker has become the quintessential Instagram-worthy coffee maker for campers and van lifers. Check most vanlife influencers’ Instagram stories for dramatic enactments of coffee-making with scenic background views. But, there’s good reason for this.
Pros
The pour-over has three pieces: the jar, filter and lid/plug. The pour-over is relatively cheap, easy to clean, comes in different sizes (good for families, couples or solo travelers) and creates minimum waste (just the coffee grounds–unless you opt to use paper filters). And let’s be honest–it really is pretty. I used the Bodum pour-over for many months and while it was tastier than my previous Starbucks instant coffee packets, it had some drawbacks.
Cons
The process of pouring water over the grounds in the filter was tedious. I tried to do it as slowly as possible to give my brew the strongest flavor, but I really had to earn my brew! It’d fill my van with steam as well on chilly mornings. Once it was done brewing, I’d pour the coffee into a separate mug–now dirtying both the coffee maker and a mug (TWO dishes to clean?!). And coffee would not stay hot for long in the glass pour-over container. Storing the big glass pour-over container was also tricky in my budget van build–I’d often keep it in my cushioned camera case.
I ended up switching to…
Practical for Solo Travelers: Microlite Javapress

I absolutely love my GSI Outdoors Microlite Javapress (I’m not sponsored by them). It’s also an optional backpacking coffee-maker, although some reviewers report it’s a little heavy for backpacking.
Pros
The Microlite Java Press is a travel mug made of three parts: the insulated mug, the filter, and the lid. I pour the coffee grounds in the bottom of the mug, fill it with hot water, then insert the filter and let it sit for a few minutes. Unlike the pour-over, I don’t have to slowly pour water over the grounds for a strong brew–I just set it and forget it.
Each part is durable and easy to clean. The insulated mug keeps my coffee hot for hours, which is actually really important when you’re living in a van without a regulated temperature. A cold morning can quickly cool your cup ‘o joe. Since I’m brewing my coffee directly in the mug, that’s one less dish to clean. The lid has also spared me from multiple coffee spills–when you live in a tiny van, it’s easy to knock things over!
I store the Microlite right in my van kitchen cabinet since it’s slim and essentially the size of a regular cup. And since it’s not made of glass, I don’t have to be gentle with it (unlike the pour-over). The only waste it produces are the coffee grounds.
Cons
There have been a few times that the last bit of coffee and coffee grounds flies out of my mug when I pull out the filter. I think this happens due to the combination of the filter’s suction and the hot/cold temperature change. I always step outside when pulling out the filter so I don’t fling coffee all over my van (oh, it’s happened). The clear plastic filter has also developed a dingy-colored tint over time. This is just an aesthetics thing, but reminds me I’m dealing with chemical-y plastic rather than glass or metal.
Of course, the Microlite is only ideal for solo travelers. I suppose if you’re traveling as a couple you could have two Microlites, but at that point you may just want a bigger coffee maker. With a price tag of $28, it isn’t the cheapest on the market. But speaking of the cheapest…
Cheapest: Vietnamese Coffee Maker
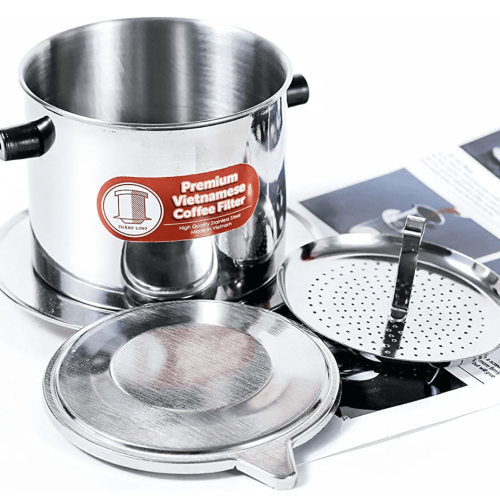
Full disclosure, I haven’t personally used a Vietnamese coffee maker (AKA phin filter) but I’ve heard from friends that it makes a great coffee maker for campers.
Pros
A phin filter has three pieces: the filter plate, brew chamber and gravity press. Here’s a one-minute tutorial on how to use it. Since this coffee maker is made of stainless steel, it’s very lightweight, durable and easy to clean. With a price range of $9-13, it’s one of the cheapest coffee makers on the market. But don’t let its price tag fool you–this is the #1 coffee-making method in Vietnam and it can deliver as strong or weak of a brew as you desire!
This coffee maker comes in different sizes, but even its largest size would only be big enough for about two people.
Cons
Since the phin filter isn’t a mesh filter but instead more of a colander, you’ll need to be extra careful about the coarseness of your coffee grounds. If your coffee grounds are too big and coarse, the water will pass right by them and create an acid-y, watery coffee. But if they’re too fine, they may clog up your filter and take forever to drain. Your coffee will also be extremely strong and potentially sludge-y at the bottom.
Simplest: Metal Coffee Dripper
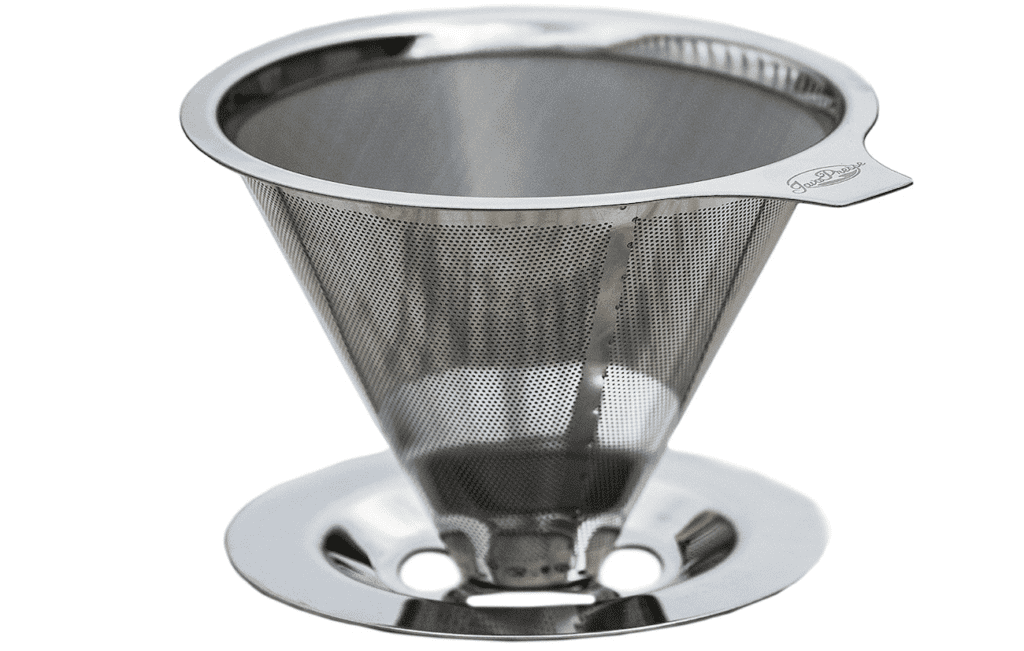
If low overhead is your #1 priority when it comes to a coffee maker for your camper, a metal coffee dripper may be for you.
Pros
Don’t worry about losing or breaking fragile pieces of a metal coffee dripper because it’s literally one piece: a filter attached to a cup plate. You place the cup plate over your mug, pour the coffee grounds in the filter, then pour water over the grounds. The stainless steel coffee maker is sturdy, lightweight, easy to clean and void of harsh plastic chemicals. The only waste produced are the coffee grounds.
This particular metal coffee maker has an extra-wide plate base, so you can use it on a solo mug or on a bigger pot of coffee. Its $20 price tag is pretty reasonable given its versatility to use for solo travelers, couples or families.
Cons
Since this camper coffee maker is technically a pour-over, you have to slowly pour water over your grounds, wait, then re-pour until they drain, in order to get a full brew. Some people like the process as part of their morning ritual (not me!). Its awkward shape can make it difficult to store easily in a campervan.
Bougie: The French Press
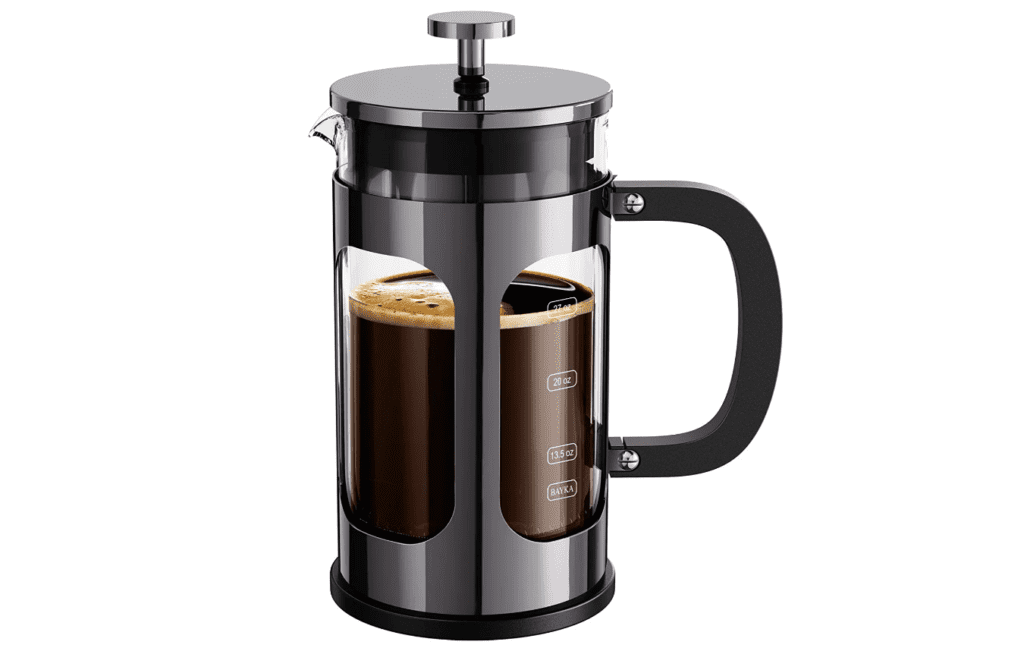
I’ve always thought of french presses as high-maintenance “bougie” coffee makers. You may think, “why would a french press make a good coffee maker for campers then?”. Well, because I was wrong about my first impression. Ha!
Pros
Forget waiting around and slowly pouring hot water over coffee grounds for the perfect brew. The french press uses the same brew method as the Microlite Javapress; you just pour the coffee grounds in the carafe, pour hot water into the carafe, then let the filter/lid rest on top of the carafe for a few minutes. Once the coffee is brewed to your liking, you slowly press down the filter to the bottom.
A french press takes up minimal storage space as well, making it an ideal choice for those in a small rig. You can also make as much or as little as you want per brew since the carafe can accommodate more than one serving. And with a typical price range of $20-$40, that’s a solid deal. The only waste produced are coffee grounds, and the french press is made of glass and metal, so no plastic chemicals at play.
Cons
I think the biggest con of french presses is their fragileness; between their fine-mesh filters and glass carafes, safely storing them in a constantly-moving van can be tough. And unlike pour-over designs, you have to get coffee grounds out from the bottom of the carafe (as opposed to flinging them out of a removable filter). Cleaning it out every day may get tedious.
All-In-One: The Percolator

The percolator rivals the pour-over in popularity among van lifers. Its simple, durable design and reasonable price tag make it a hot pick.
Pros
The best thing about a percolator is that you heat up water and brew your coffee all in the same pot. All of the other coffee makers we’ve talked about so far require a teapot or some other way to get your boiling water–but not the percolator!
Think of the percolator as a teapot with a filter to keep your coffee grounds. All you need is a stovetop to brew coffee. Made of 100% stainless steel, the percolator and its filter are pretty rugged, easy to clean, and hold warmth better than the french press or pour-over glass carafes. The only waste created is the coffee grounds. The percolator comes in all different sizes but it’s ideal for couples or families. Prices typically range from $25-50.
Cons
There aren’t any big cons of the percolator. Its filter is slightly more intricate and delicate than the pour-over, making it potentially more fragile to store. And since the coffee grounds are kept inside the pot, cleaning it out after each use may be a little more tedious than a pour-over.
Ultimate Stealth: Coffee Straw
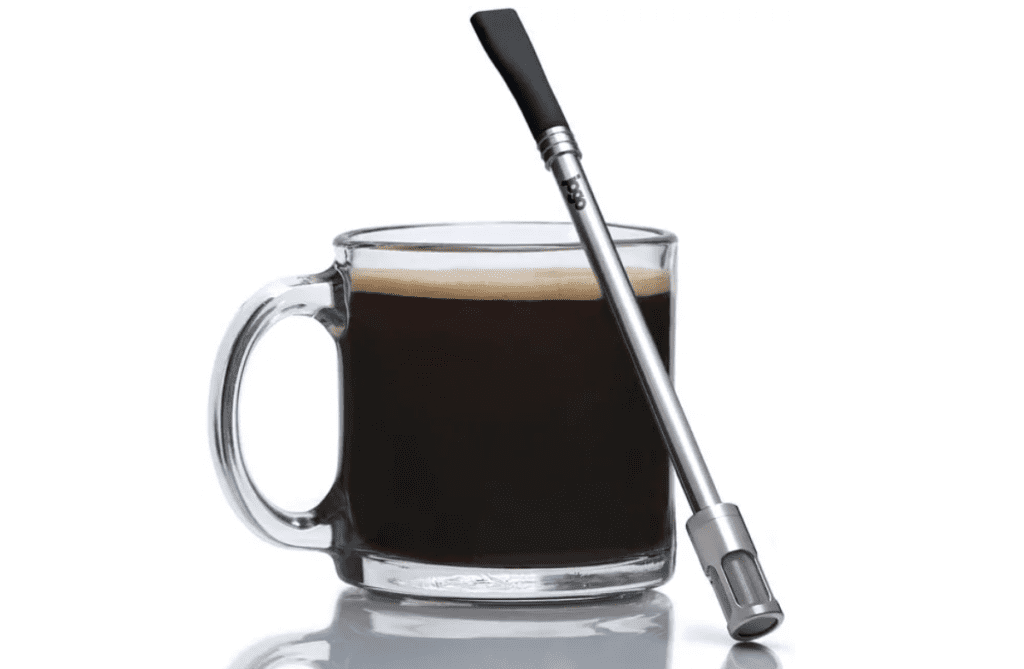
If you’re really on-the-go and don’t have time to clean a coffee maker every morning, check out this portable coffee straw. It would be my top pick for my next camping trip.
Pros
When it comes to coffee makers for campers, you can’t get more space-saving than a coffee straw. Simply pour your coffee grounds into your mug, pour in hot water, let sit for a few minutes and then use your straw to sip away! I would argue the ease of use for this coffee maker is unbeatable.
The straw’s fine mesh filter prevents coffee grounds from going up the straw. It also saves your teeth from becoming coffee-stained. Bonus–it can also be used with tea leaves.
Cons
Drinking coffee out of a straw is not for everyone (including me). It’s definitely the most expensive straw I’ve come across (coming in at $25). Although it’s super small, it may also get lost easily–we all know how easy it is to lose things in your van!
Espresso Lovers: Manual Espresso Maker

For those traveling coffee connoisseurs, you can have an on-the-go espresso machine that doesn’t require a power source. Its current price tag is $65.
Pros
The Staresso stainless steel Espresso maker is sturdy, compact, and allegedly delivers a mean cup of espresso. You also have the option of using pre-made cups (a little wasteful, but easier to clean up) or a reusable filter (messier, but environmentally-friendly). This espresso maker uses less coffee grounds than a regular coffee maker; sparing your coffee supply a bit.
Cons
This device is made up of 5-6 pieces (hard to tell exactly how many from the video) but the more pieces, the higher chance of losing or breaking a piece. Also, the more pieces to clean! It’s a little pricey ($65) but for a hot espresso anytime anywhere, it seems reasonable.
12V RoadPro Drip Coffee Maker
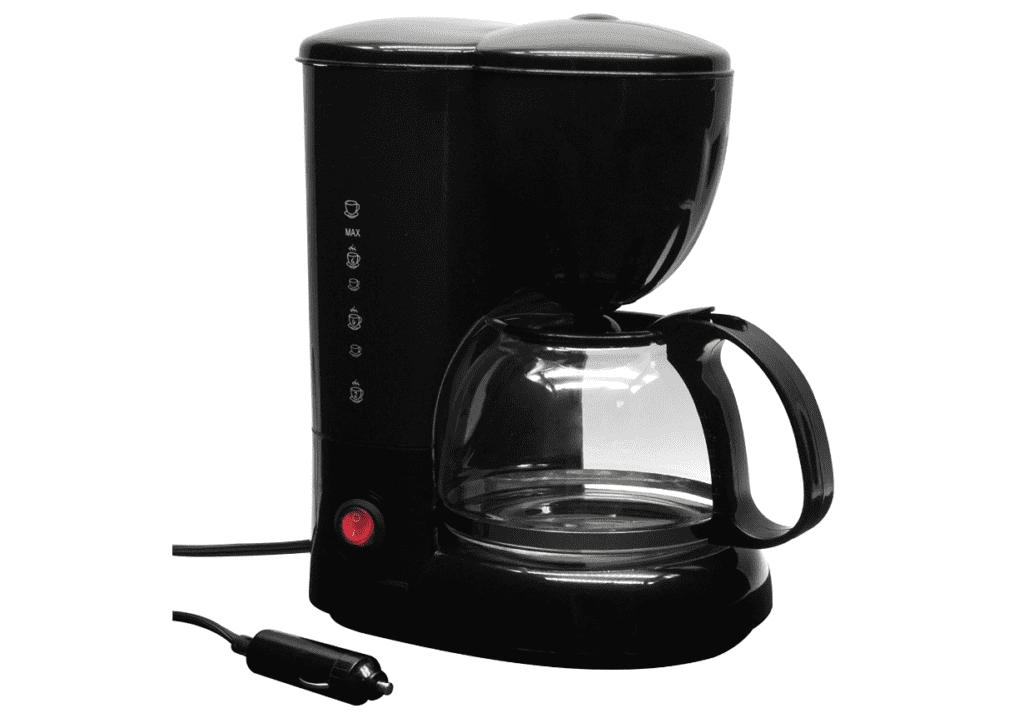
If you’re looking for that at-home brewing feel, the RoadPro 12V coffee maker may be your best bet. Just make sure you have a 12V port to run this camper coffee maker!
Pros
Advertised as “brewing 20 ounces in 20 minutes”, this is a great option for coffee makers who want to set it and forget it. No stovetops, teapots or slow-pours required–it even comes with a reusable filter.
Like a regular coffee pot at home, you pour water into the water reservoir of the coffee brewer, pour your coffee grounds into the filter, place it into the top of the brewer, then place your carafe underneath the filter and flip the switch on. I think this is one of the best RV coffee maker options.
Cons
This 12V coffee maker will take up a fair amount of counter space, and twenty minutes is a fairly long brew time. It will also suck up precious power supply from your van or RV–but not much. It also isn’t a programmable coffeemaker, so it requires manual shut-off.
You’ll also want to rinse it out by running distilled vinegar through it every few months. The plastic material may wear and become brittle over time (especially in a non-temperature regulated rig). It’s a little pricey compared to a full-size regular coffee maker, coming in at $33.
Makita 12V Cordless Coffee Maker
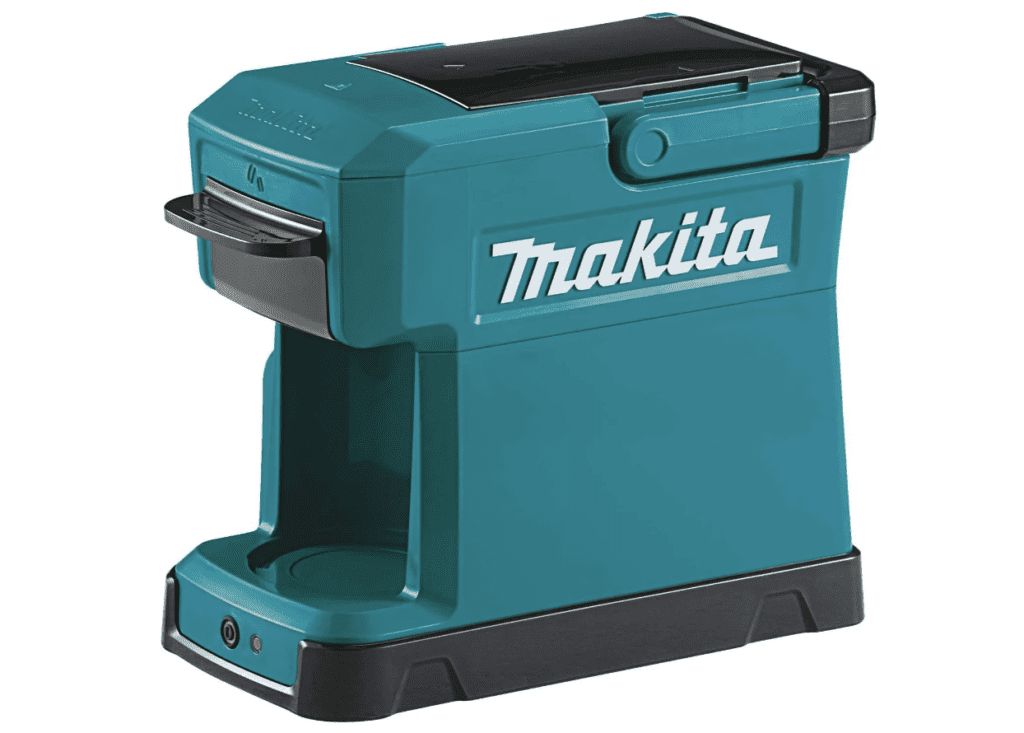
The Makita 12V lithium-ion cordless coffee maker is in a league of its own in terms of durability, quality and…price–eek! This high-quality coffee machine may be the king of coffee makers for campers.
Pros
The Makita coffee maker can brew 5 ounces in just 5 minutes, be charged with an 18V or 12V power supply, and be used outside thanks to its cordless feature. It acts like a regular drip-coffee maker–just add water and your coffee grounds. It’s super compact and comes with an adjustable handle grip. The only waste is the coffee grounds.
Cons
Compared to a percolator or french press, it’s pretty bulky. With a price tag of $134, you’ll want to be sure you are serious about your coffee game! I think this portable coffee maker is the most ideal for an RV kitchen, since it will have more space than a campervan kitchen.
Cold Brew Mason Jar
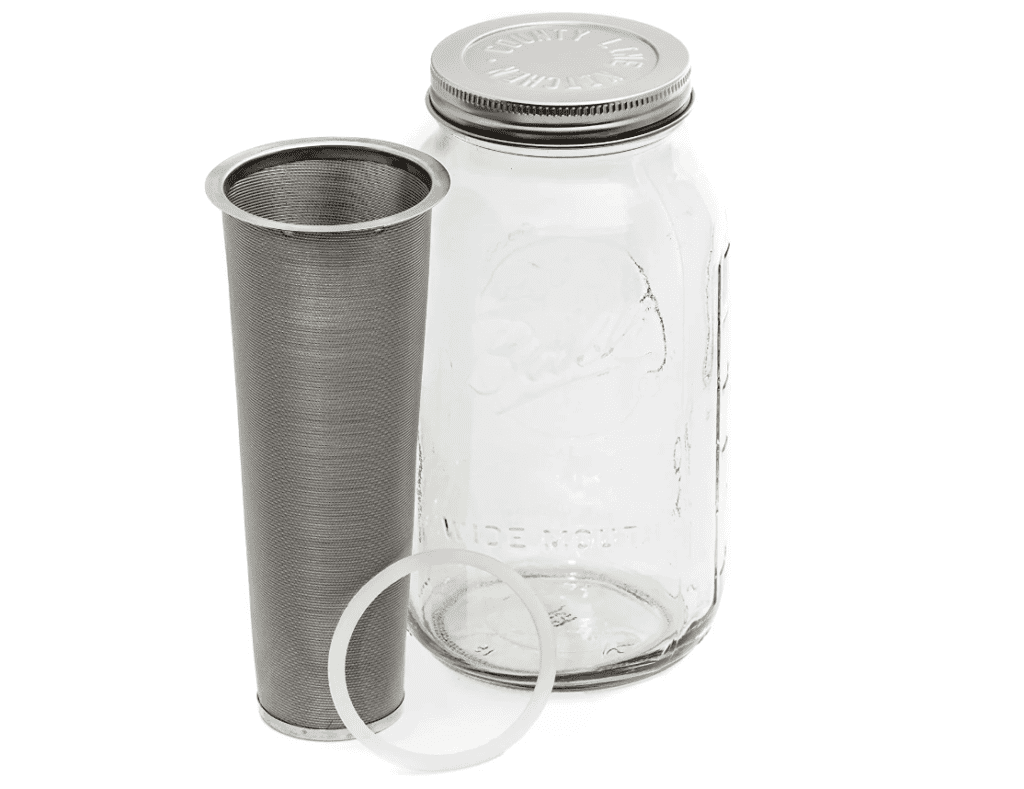
For the cold brew lovers of the world, opt for this stylish and practical single-cup cold brew mason jar for $30.
Pros
It’s hard to go wrong with this super simple design: mason jar, stainless steel filter and lid. Just pour your grounds into the filter, place the filter in the jar, fill the jar with water and let it sit overnight. Easy to clean and reusable filter means the only waste is coffee grounds.
And bonus–it’s dishwasher safe (for any of you lucky RVers with a dishwasher).
Cons
I think $30 is a little steep for just a mason jar and filter. Also, some reviewers report that the rim of the filter isn’t sturdy and can fray.
Coffee Camper Accessories
There are a few camping coffee accessories that’ll make your daily cup of joe that much more enjoyable!
Manual Coffee Grinder
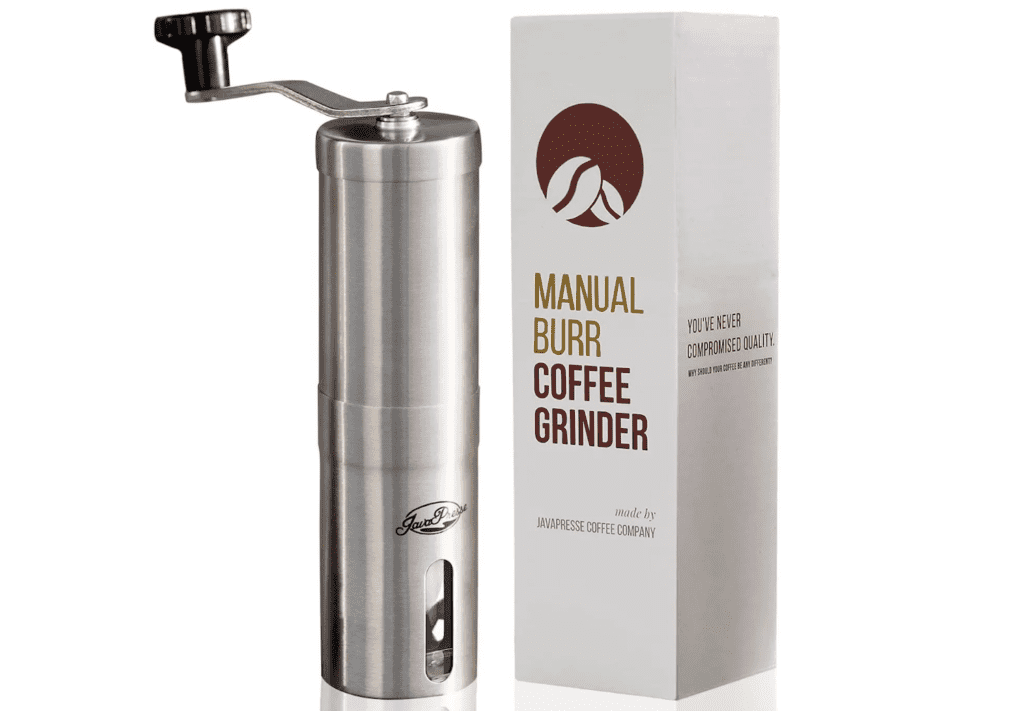
If you want fresh-ground coffee beans with each brew, check out Javapresse’s manual coffee grinder! There’s no question that fresh-ground coffee always has a richer flavor.
Portable Water Filter
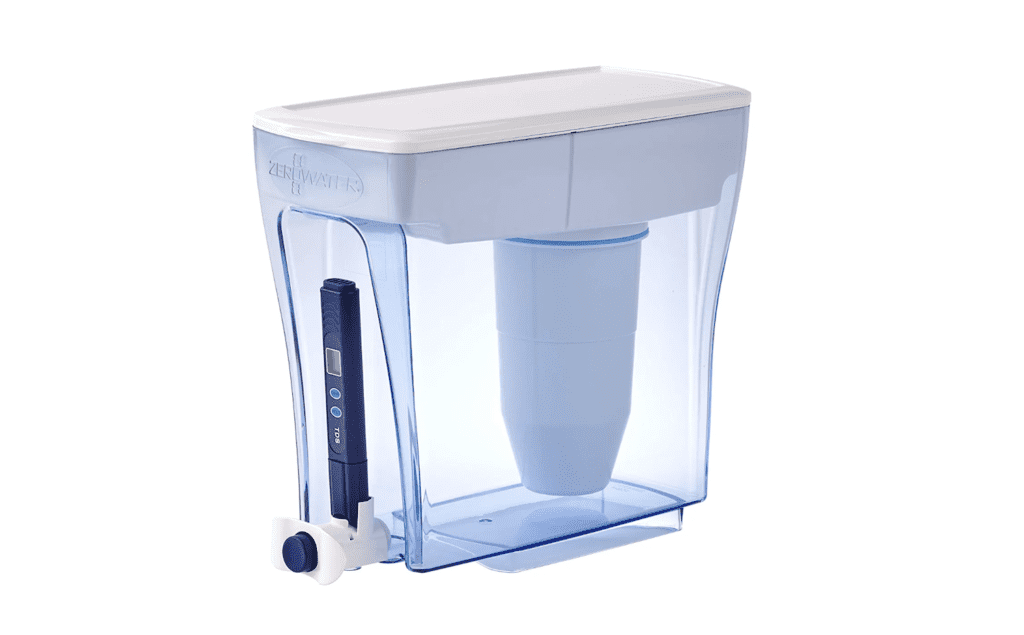
A water filter is great to have whether it’s for coffee, tea, or just plain ‘ol drinking water. I recommend the ZeroWater filter (thanks to vanlife friends who use this).
Bottle Brush
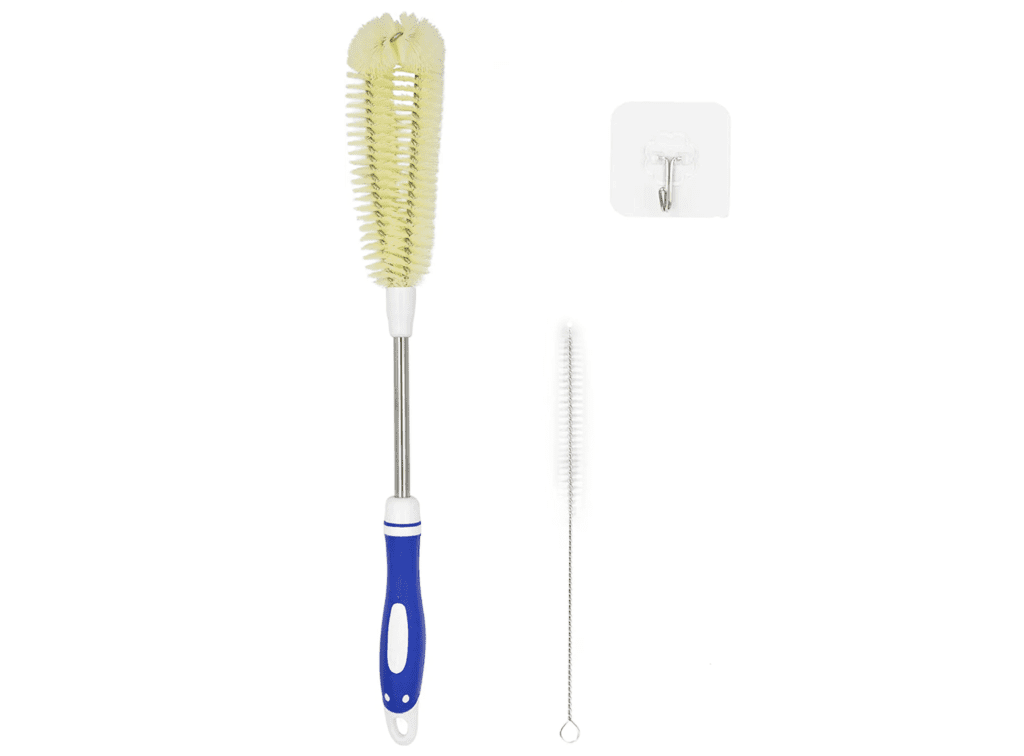
A lot of the coffee makers covered in this article have filters or accessories that can be tough to clean with a regular sponge. I carry a dish-washing bottle brush for my coffee maker–I recommend the Temede bottle brush.
Summing It Up
Take a little slice of home with you no matter where you are with a hot cup of coffee! And sometimes, having an instant coffee packet on hand is a life-saver. My favorites are Kuju camping coffee and Starbucks instant packets.
So…which camping coffee maker will suit the camper in you?
Save on Pinterest!